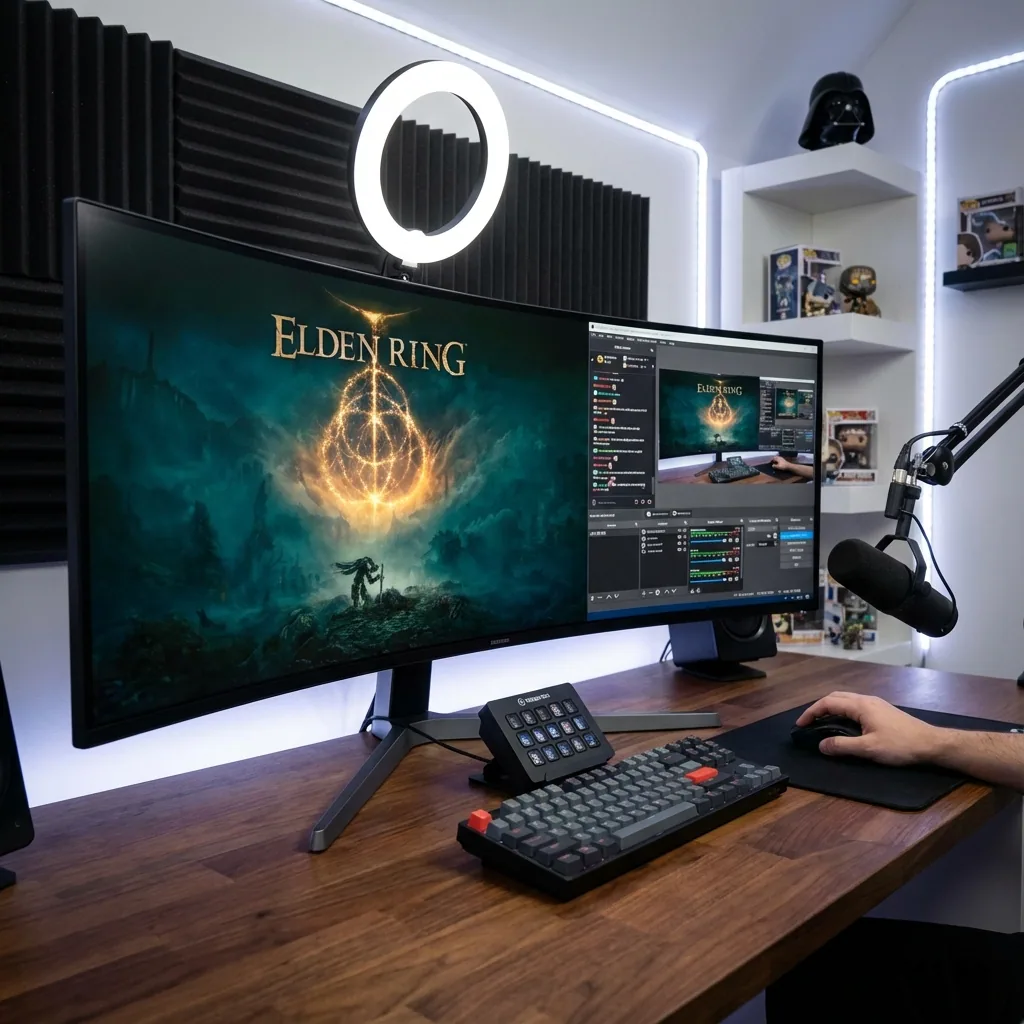
Every streaming guide on the internet assumes you have two monitors. "Put your game on the primary monitor and OBS/chat on the secondary." Great advice—unless you don't have a second monitor.
Maybe you're streaming on a laptop. Maybe you have a 34" ultrawide and don't want another monitor cluttering your desk. Maybe you just don't want to spend $200-400 on a second display. Whatever the reason, you want to stream on a single monitor and actually see your chat, OBS, alerts, and game simultaneously.
I've been streaming on a single ultrawide monitor for over two years—everything from competitive FPS to variety streams. No second monitor, no constant alt-tabbing, no "sorry, didn't see chat" moments. Everything is visible, performance is great, and my setup actually works.
This guide will show you exactly how to set up a professional single monitor streaming setup with OBS, chat, alerts, and your game all on one screen.
Why Stream on a Single Monitor?
Let's address the elephant in the room: isn't streaming on two monitors just better?
When Single Monitor Makes Sense
You have an ultrawide or 4K monitor: If you're running 3440x1440, 5120x1440, or 3840x2160, you have enough pixels to split between your game and streaming tools. A second monitor would be redundant.
Desk space is limited: Not everyone has a massive desk. Laptops, smaller setups, or shared spaces make dual monitors impractical.
You want everything in your field of view: Looking away from your main monitor to check chat on a second screen breaks immersion and slows reaction time. Single-screen streaming keeps everything visible without moving your eyes much.
Budget constraints: A quality second monitor costs $150-500. If you already have a good primary monitor, spending that money on a better mic or camera might be smarter.
Streaming while traveling: Laptop streamers can't exactly carry a second monitor. Single-screen streaming is the only option.
The Traditional Multi-Monitor Streaming Setup
For context, here's the "standard" approach:
Monitor 1 (Primary): Your game in fullscreen Monitor 2 (Secondary): OBS Studio, chat overlays, StreamElements/Streamlabs dashboard, alerts, music controls, social media
The Problem: You're constantly looking away from your game to check chat or OBS. In fast-paced games, this gets you killed. In story-driven games, it breaks immersion. And you need the desk space and budget for that second monitor.
The Single Monitor Approach
One screen, divided into zones:
- Game Stage (center, running in fullscreen mode)
- OBS preview (corner or side, so you see what's on stream)
- Chat window (side zone, persistent visibility)
- Alerts/StreamElements (small zone, catches your attention)
- Music/Discord (optional zones based on needs)
Everything is visible, nothing requires alt-tabbing or looking away from your main screen.
Single Monitor Streaming: The Technical Challenge
Before we dive into solutions, let's understand why single-monitor streaming is tricky.
The Fullscreen Problem
When you run a game in fullscreen mode, it takes exclusive control of your display. This gives the best performance (highest FPS, lowest latency), but it hides everything else on your screen—including OBS, chat, and alerts.
The Borderless Windowed Compromise
Most single-monitor streaming guides tell you to run games in borderless windowed mode. This lets you see other apps while gaming.
The Problem: Borderless windowed mode can hurt performance. You lose exclusive fullscreen optimizations, potentially resulting in:
- 2–11% lower FPS (measured)
- Higher input latency
- Worse frame pacing and microstutters
- DWM (Desktop Window Manager) overhead
For competitive streaming or GPU-intensive games, this performance loss is unacceptable. Read more about borderless vs fullscreen performance.
The Alt-Tab Dance
Some streamers run fullscreen for performance and alt-tab to check OBS/chat.
The Problem:
- Breaks immersion and interrupts gameplay
- Viewers see the game minimize/restore
- You miss chat messages and alerts during gameplay
- Some games crash or stutter when alt-tabbing
This is a terrible viewer experience.
The Better Solution: Zone-Based Streaming
Here's the approach that actually works: dedicated zones on your single monitor where your game runs in native fullscreen mode while OBS, chat, and alerts stay visible in surrounding zones.
How Zone-Based Streaming Works
- Define a "Game Stage" zone (e.g., 2560x1440 in the center of a 3440x1440 ultrawide)
- Create zones for streaming tools (OBS preview, chat, alerts, music)
- Launch your game in the Game Stage with native fullscreen performance
- All streaming tools stay persistently visible in their zones
Your game maintains fullscreen performance while you monitor chat, OBS status, alerts, and everything else without alt-tabbing.
What Resolution Do You Need?
3440x1440 Ultrawide (34"): Ideal. Plenty of room for a 2560x1440 Game Stage plus OBS and chat on the sides.
2560x1440 Standard: Works well. Run your game at 1920x1080 or 2048x1152 with chat and OBS on the sides.
1920x1080: Tight, but possible. You'll need to sacrifice game resolution (1600x900 or 1440x900) to fit streaming tools. Worth it if chat interaction matters to you.
5120x1440 Super Ultrawide (49"): Massive overkill in the best way. Fit everything with room to spare.
3840x2160 4K: Great for streaming. Run your game at 1920x1080 or 2560x1440, use the extra space for streaming dashboard.
Step-by-Step Single Monitor Streaming Setup
Let me walk through the complete setup process.
Step 1: Install and Configure OBS Studio
Download OBS Studio from obsproject.com (it's free and open-source).
Run the Auto-Configuration Wizard:
- Open OBS → Tools → Auto-Configuration Wizard
- Select "Optimize for streaming"
- Choose your streaming platform (Twitch, YouTube, etc.)
- Let OBS detect optimal settings for your hardware
Key OBS Settings for Single Monitor:
Video Settings:
- Base (Canvas) Resolution: Your full monitor resolution (e.g., 3440x1440)
- Output (Scaled) Resolution: 1920x1080 (standard for most streams)
- FPS: 60 (or 30 for slower-paced games)
Output Settings:
- Encoder: NVENC (NVIDIA), AMD VCE (AMD), or x264 (CPU encoding)
- Bitrate: 6000 kbps for Twitch, 8000-10000 kbps for YouTube
- Preset: Quality (NVENC) or Medium (x264)
Step 2: Set Up OBS Scene for Zone Capture
This is crucial for single-monitor streaming.
Traditional Approach (Doesn't Work Well):
- Add "Display Capture" source to capture your entire screen
- Problem: Captures your chat, OBS, and other tools visible on screen, creating a recursive loop
Correct Approach: Zone-Based Game Capture
Option A: Window Capture
- Add source → Window Capture
- Select your game window
- Problem: Not all games work well with window capture, some have black screens or performance issues
Option B: Display Capture with Cropping
- Add source → Display Capture
- Right-click source → Filters → Crop/Pad
- Crop to only show your Game Stage zone
- This captures just the game area, not your chat or OBS windows
Option C: Game Capture (Best for Performance)
- Add source → Game Capture
- Mode: Capture specific window
- Select your game
- This captures the game directly with minimal overhead
For zone-based streaming, I recommend Game Capture when it works, with Display Capture + Cropping as a fallback.
Step 3: Zone Layout for Single Monitor Streaming
Here's my exact layout on a 3440x1440 ultrawide:
Game Stage (Center): 2560x1440
- This is where the game runs in fullscreen mode
- OBS captures this zone using Game Capture or cropped Display Capture
Chat Window (Right Side): 440px width
- Twitch/YouTube chat popout window
- Positioned in dedicated zone, always visible
- Uses Chatterino or built-in platform chat
OBS Preview (Bottom Right): 440x250px
- Minimized OBS window showing stream preview
- Lets you monitor what's actually on stream
- Catches issues like black screens or crashes
Music/Alerts (Top Right): 440x200px
- Spotify, Pretzel Rocks, or music player
- StreamElements/Streamlabs alert box (browser source in small window)
Optional Discord (Left Side): 440px width
- If you're streaming with friends or need voice chat visible
- Keep Discord visible while gaming
You can adjust sizes based on your monitor resolution and priorities.
Step 4: Configure Game for Zone-Based Streaming
Set your game resolution to match your Game Stage zone:
- If your Game Stage is 2560x1440, set the game to 2560x1440
- If your Game Stage is 1920x1080, set the game to 1920x1080
Important: Use fullscreen mode, not borderless windowed. Zone-based software (like Staged) allows fullscreen mode to work within the zone while keeping other apps visible.
Test in OBS:
- Start a recording or stream test
- Check that your game is captured correctly
- Verify that chat, OBS, and other zones aren't visible on stream
- Make sure the game maintains good performance
Step 5: Set Up Chat Integration
Option 1: Platform Chat Popout
- Twitch: Click the settings icon in chat → Popout Chat
- YouTube: Click the three dots in live chat → Pop out chat
- Position the popout window in your chat zone
Option 2: Chatterino (Better)
- Download Chatterino (free, open-source Twitch chat client)
- Lightweight, customizable, better than native chat
- Supports BTTV, FFZ, 7TV emotes
- Split view for multiple channels if you're multi-streaming
Option 3: Streamlabs/StreamElements Dashboard
- Browser-based streaming dashboard
- Shows chat, alerts, recent followers, donations
- Can replace multiple separate windows
- More resource-heavy but all-in-one solution
Step 6: Using Staged for Zone Persistence
Here's the honest truth: setting this up manually is tedious. Games reset window positions, fullscreen mode overrides window management, and you have to reconfigure everything per game.
Staged automates the entire process:
- Install Staged from staged.gg/download
- Create your Game Stage zone (where games run in fullscreen)
- Create zones for OBS, chat, Discord, music, etc.
- Launch your game from Staged—it runs in fullscreen mode within the Game Stage
- All your streaming tools stay visible in their zones, persisting across game launches
I built Staged specifically for this use case because I was tired of manually setting up zones for every streaming session.
OBS Configuration for Zone-Based Streaming
Let's optimize OBS specifically for single-monitor zone streaming.
Scene Setup
Scene 1: Gameplay
- Source: Game Capture (or Display Capture cropped to Game Stage)
- Overlays: Webcam, alert widgets, stream labels
- This is your main streaming scene
Scene 2: BRB/Intermission
- Static image or animated background
- "Be Right Back" text
- Music visualization or looping video
- Use this when you step away
Scene 3: Starting Soon
- Pre-stream countdown
- Social media info, stream schedule
- Background music
Scene 4: Chatting
- Just your webcam (fullscreen or centered)
- Use this when talking to chat between games
Webcam Positioning
On a single monitor, your webcam is probably top-center of your monitor. In OBS, position your webcam overlay:
- Bottom right or left corner (classic position)
- Bottom center (if you want to be prominent)
- Avoid top center (blocks game UI elements)
Make sure it doesn't cover critical game UI like health, ammo, or minimap.
Alerts and Overlays
StreamElements or Streamlabs Browser Source:
- Add browser source to OBS
- Load your alert box URL
- Position in top-center or top-right of stream
- Set size to 400x300px or similar
Keep alerts visible in your local view too: Open the alert box URL in a browser window in one of your zones so you see alerts as they happen, not just what viewers see.
Audio Management
Game Audio: Captured automatically by OBS Microphone: Add as audio input source Music/Spotify: Add desktop audio or use virtual audio cable for separate control Discord/Voice Chat: Use OBS filters to balance voice levels with game audio
Pro tip: Use a noise suppression filter on your mic (RNNoise or NVIDIA Broadcast). Single-monitor setups often mean your PC is closer to your mic, so fan noise can be an issue.
Performance Optimization
GPU Encoding (NVENC or VCE): Offloads encoding from CPU, critical when gaming and streaming on the same machine.
Process Priority: Set OBS to "Above Normal" priority in Task Manager to prevent frame drops during CPU-intensive game moments.
Limit Preview FPS: OBS Settings → Video → Limit preview FPS to 30. Reduces OBS overhead since you're watching your zones, not the OBS preview constantly.
Use Game Mode: Windows Game Mode can help balance resources between game and OBS.
Best Games for Single Monitor Streaming
Some games work better than others for single-monitor streaming.
Great for Single Monitor
Turn-Based or Slower-Paced Games:
- Baldur's Gate 3, Civilization VI, XCOM 2: Plenty of downtime to read chat and interact
- Stardew Valley, Terraria, Minecraft: Relaxed gameplay, easy to chat while playing
Strategy and Simulation:
- Cities Skylines, Planet Zoo, Factorio: You're pausing and planning frequently, easy to monitor chat
Story-Driven Games:
- RPGs, narrative adventures: Natural pauses in dialogue and cutscenes let you check chat
Challenging for Single Monitor
Competitive FPS:
- Valorant, CS2, Apex Legends: Fast-paced, high concentration required. Hard to read chat mid-match.
- Solution: Read chat between rounds or matches. Zone-based setup still helps you see chat during downtime.
Rhythm Games:
- Beat Saber, OSU: Require complete focus, can't read chat while playing.
- Solution: Check chat between songs.
Soulslike Games:
- Elden Ring, Dark Souls: High difficulty, punishing gameplay. Reading chat during boss fights = death.
- Solution: Chat interaction happens after boss kills or during exploration.
Ideal Streaming Schedule for Single Monitor
Pre-stream (Starting Soon): Chat-heavy, you're not in a game yet. Read and respond to everyone.
Gameplay: Focus on the game, glance at chat during natural pauses. Respond to important messages.
Between matches/deaths/levels: Full chat interaction. This is when you build community.
End of stream: Thank subs, answer questions, plan next stream.
Single-monitor streaming works best when your game has natural downtime for chat interaction.
Advanced Single Monitor Streaming Tips
Tip 1: Use Text-to-Speech for Chat
Since you can't constantly watch chat during intense gameplay, TTS reads important messages aloud. StreamElements and Streamlabs both support TTS.
Filter settings: Set minimum bits/subs for TTS to avoid spam. Enable profanity filter. Set reasonable character limits.
Tip 2: Stream Deck or Macro Pad
A Stream Deck (or cheaper alternative like the Elgato Stream Deck Mobile app) gives you quick scene switching, audio control, and OBS shortcuts without alt-tabbing.
Essential macros:
- Switch scenes (Gameplay, BRB, Starting Soon)
- Mute/unmute mic
- Start/stop recording
- Toggle sources on/off
- Sound effects or alert triggers
This is especially helpful on a single monitor where switching to OBS to click buttons breaks your game view.
Tip 3: Second PC Encoding (If You Have One)
If you have an old laptop or secondary PC, you can use it for encoding while gaming on your main PC. This is called dual-PC streaming.
Your main PC runs the game, capture card sends gameplay to the second PC, which handles OBS encoding and streaming.
Benefit: Zero performance impact on your gaming PC. Downside: Requires a capture card, more setup complexity, and you still need to monitor chat on your gaming PC.
For single-monitor users, dual-PC streaming doesn't solve the layout challenge—you still need zone-based setup on your main monitor for chat visibility.
Tip 4: Steam Rich Presence
If you're streaming Steam games, enable Rich Presence in Staged or similar tools. This shows your current game, playtime, and stats on your stream overlay automatically without manual updates.
Tip 5: Browser Source Docks in OBS
OBS supports docking browser sources directly in the interface. You can dock your chat as a browser source within OBS.
The problem: This only helps if you're looking at OBS. For zone-based streaming, you want chat visible next to your game, not inside OBS.
Frequently Asked Questions
Can I really stream on one monitor without performance loss?
Yes, if you use zone-based gaming with native fullscreen mode. Your game runs in fullscreen within its dedicated zone (native fullscreen performance — no borderless penalty), while streaming tools stay visible in surrounding zones. Avoid borderless windowed mode for the best performance. Read about borderless vs fullscreen performance.
What monitor resolution do I need for single monitor streaming?
Minimum 1920x1080, but realistically 2560x1440 or 3440x1440 is much better. The more pixels you have, the easier it is to fit your game, chat, and OBS on one screen comfortably. Ultrawide monitors (21:9 or 32:9) are ideal for single-monitor streaming because you have plenty of horizontal space for zones. Check out the ultrawide gaming guide.
Should I stream at 1080p or 720p on a single monitor?
Stream at 1080p 60fps if your internet upload speed and hardware can handle it (6000+ kbps bitrate for Twitch, 8000+ for YouTube). If you're struggling with encoding lag or internet bandwidth, drop to 720p 60fps. Your local game resolution (in your Game Stage) is separate from your stream output resolution. You can play at 1440p locally and stream at 1080p.
How do I keep chat visible during fullscreen games?
Use zone-based gaming software like Staged to create a dedicated chat zone that stays visible while your game runs in fullscreen mode. Alternatively, run the game in borderless windowed mode (with performance trade-offs) or use a chat popout window positioned in a zone on your monitor. The key is having persistent chat visibility without alt-tabbing.
What's better for streaming: single monitor or dual monitor?
Dual monitor is easier if you have the space and budget—you get full native game resolution on your primary monitor and all streaming tools on the secondary. Single monitor is better if you want everything in your field of view, lack desk space, have an ultrawide or 4K display with plenty of pixels, or want to save money. Zone-based single-monitor streaming gives you 90% of the dual-monitor experience without the extra hardware.
Bottom line: Single monitor streaming in 2025 is completely viable with the right setup. Zone-based gaming lets you run your game in fullscreen mode with native performance while keeping OBS, chat, alerts, and Discord all visible on one screen.
You don't need a second monitor to stream professionally. You just need smart zone management and the right software.
If you want to skip the manual setup headaches and get straight to streaming, download Staged and create your perfect single-monitor streaming layout in minutes. Your viewers won't know you're using one screen—they'll just wonder why you're so good at responding to chat.
— Steve Miller, single-monitor streamer and creator of Staged
